Alarmy - Eternal Terrarium and Alarm clock
An eternal terrarium (also sometimes referred to as a bottle garden) is a glass vessel filled with substrate, hardscape (rocks and wood) and plants, which is then sealed airtight to create a mini ecosystem. Due to the container being sealed there is no water escaping, instead water vapor will condense on the glass and "rain" down again. With only light coming in the vessel will create a closed ecosystem, like earth, just a lot smaller.
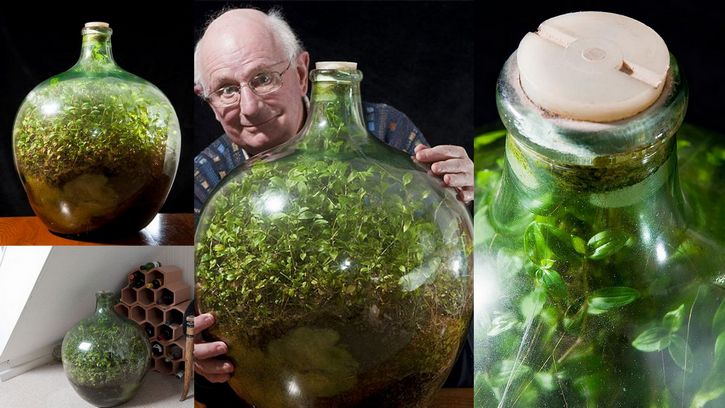
This bottle garden has been sealed for over 50 years!
I build eternal terrariums (with more and less success) in the past, so when I was searching for a birthday present for my girlfriend who just moved into her first apartment I thought I found just the right thing. But just this would be boring, that's why I wanted to combine it with another idea I had floating on my potential projects list for a while.
A while back I noticed I was able to wake up easier when natural light fills my room instead of my alarm pulling my out of my sleep. I wanted to incorporate that into the project, as a programmable light on your nightstand to help to wake you in lighter sleep phases instead of just pulling your from your sleep. It is not intended to replace the alarm clock on your phone, but to substitute it (and besides it makes a cool thing to have).
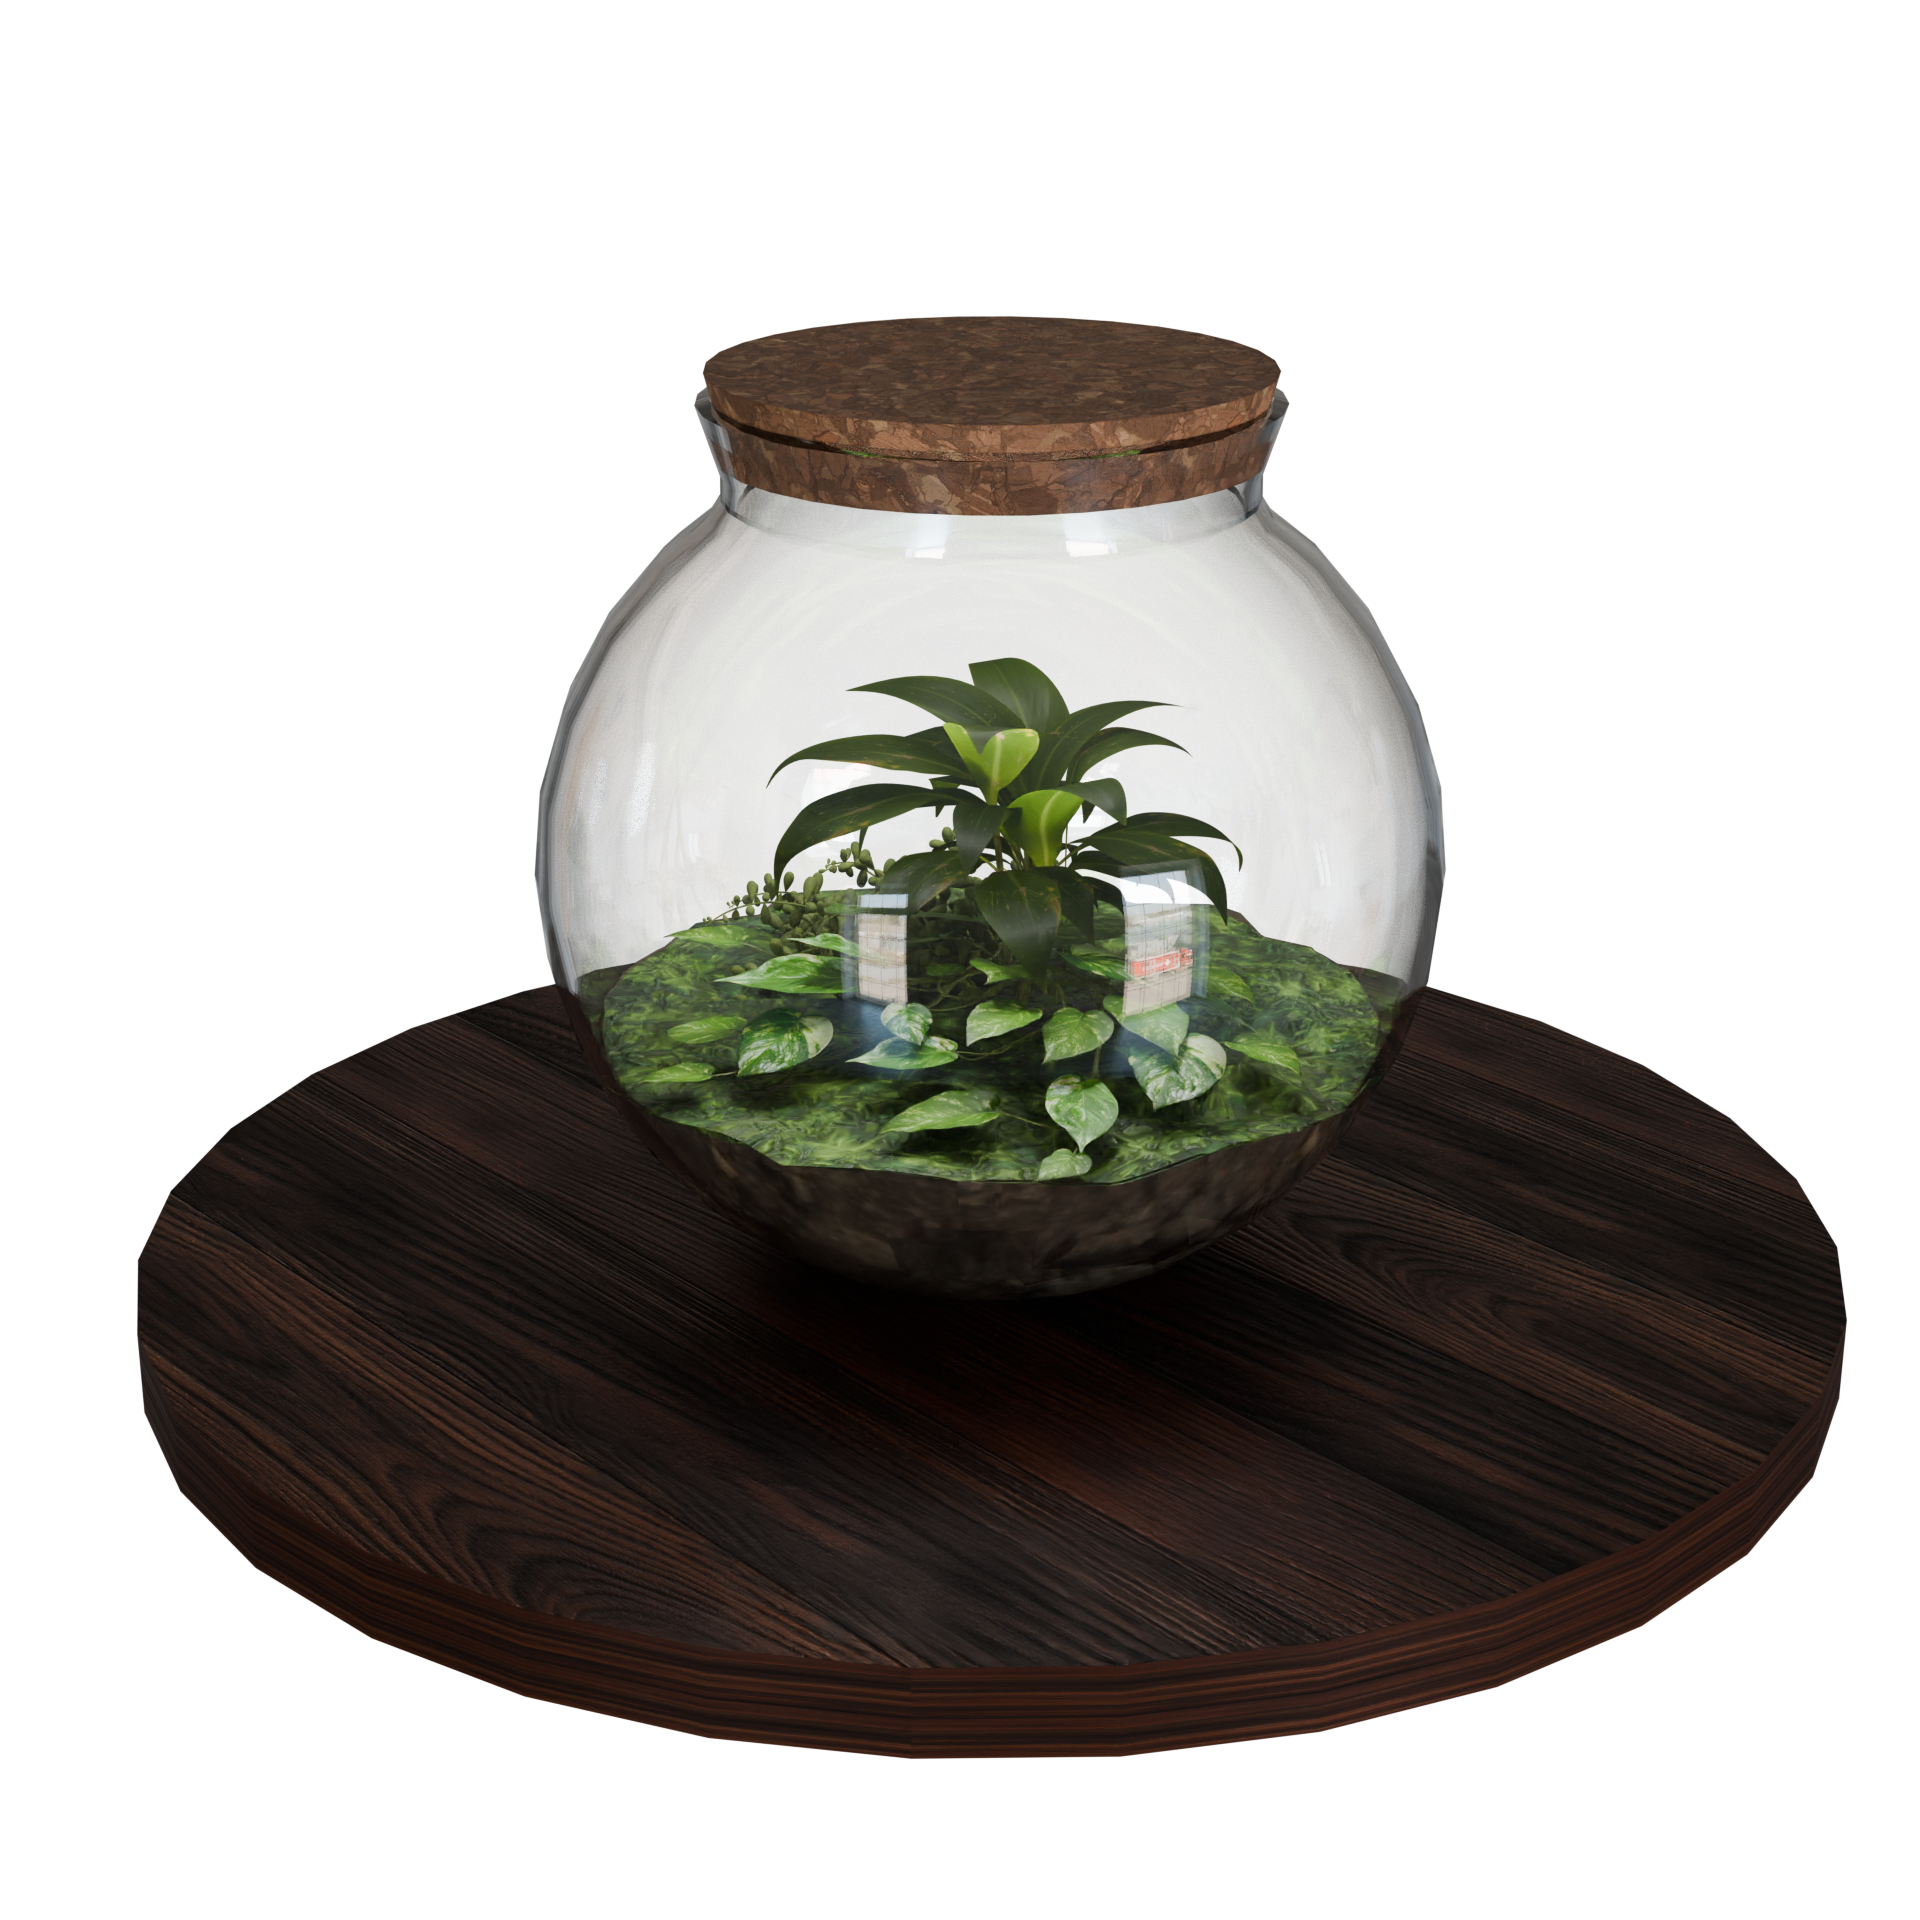
A concept render I started out with to visualize my plan
First attempts
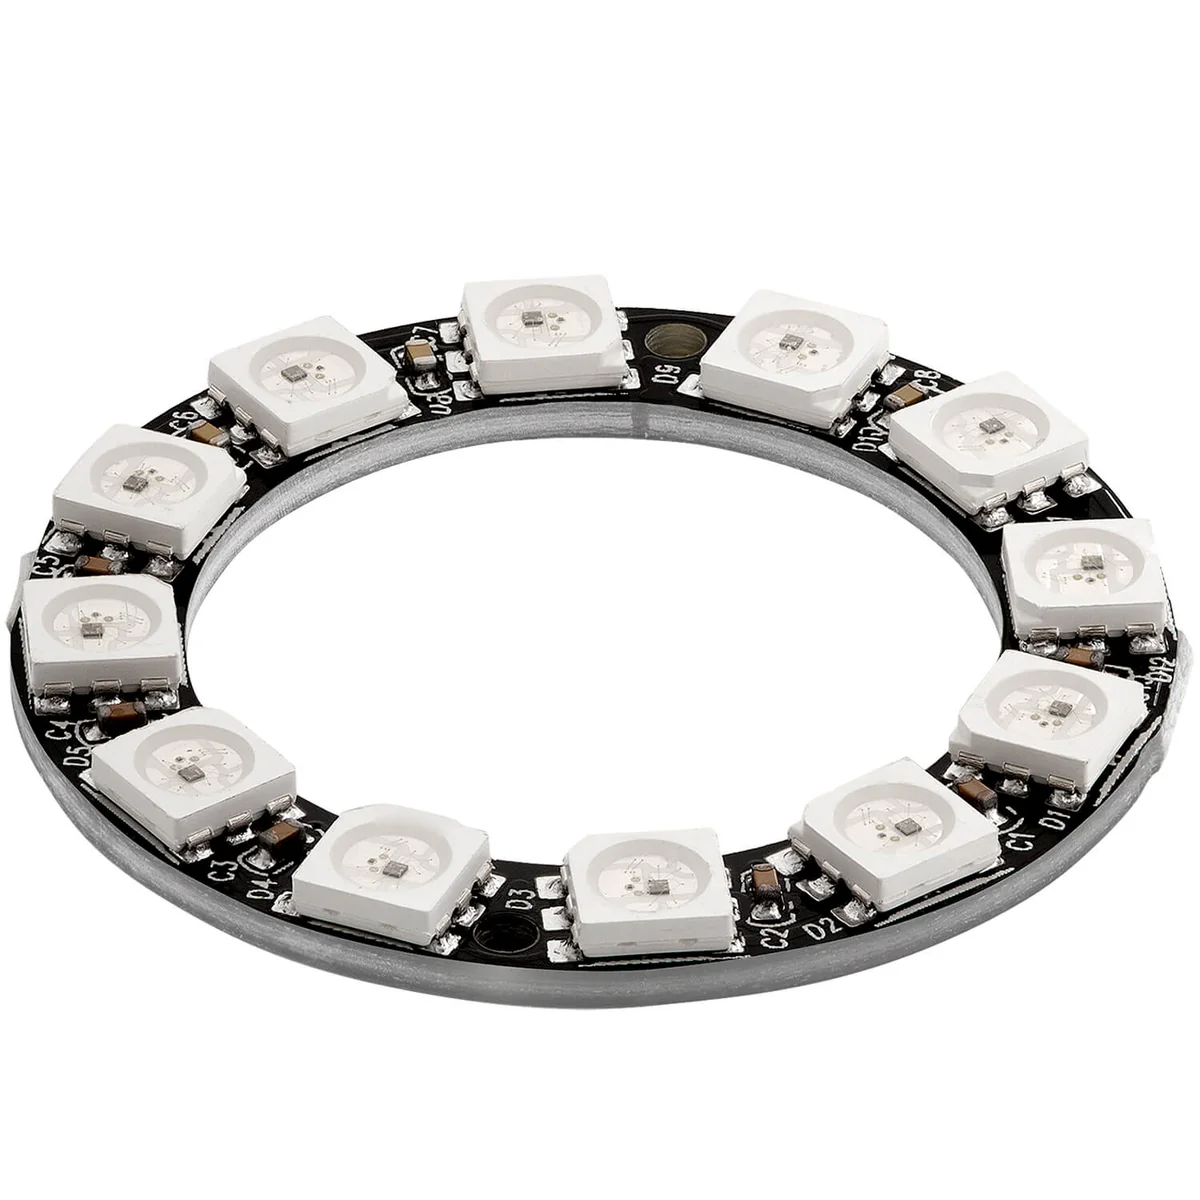
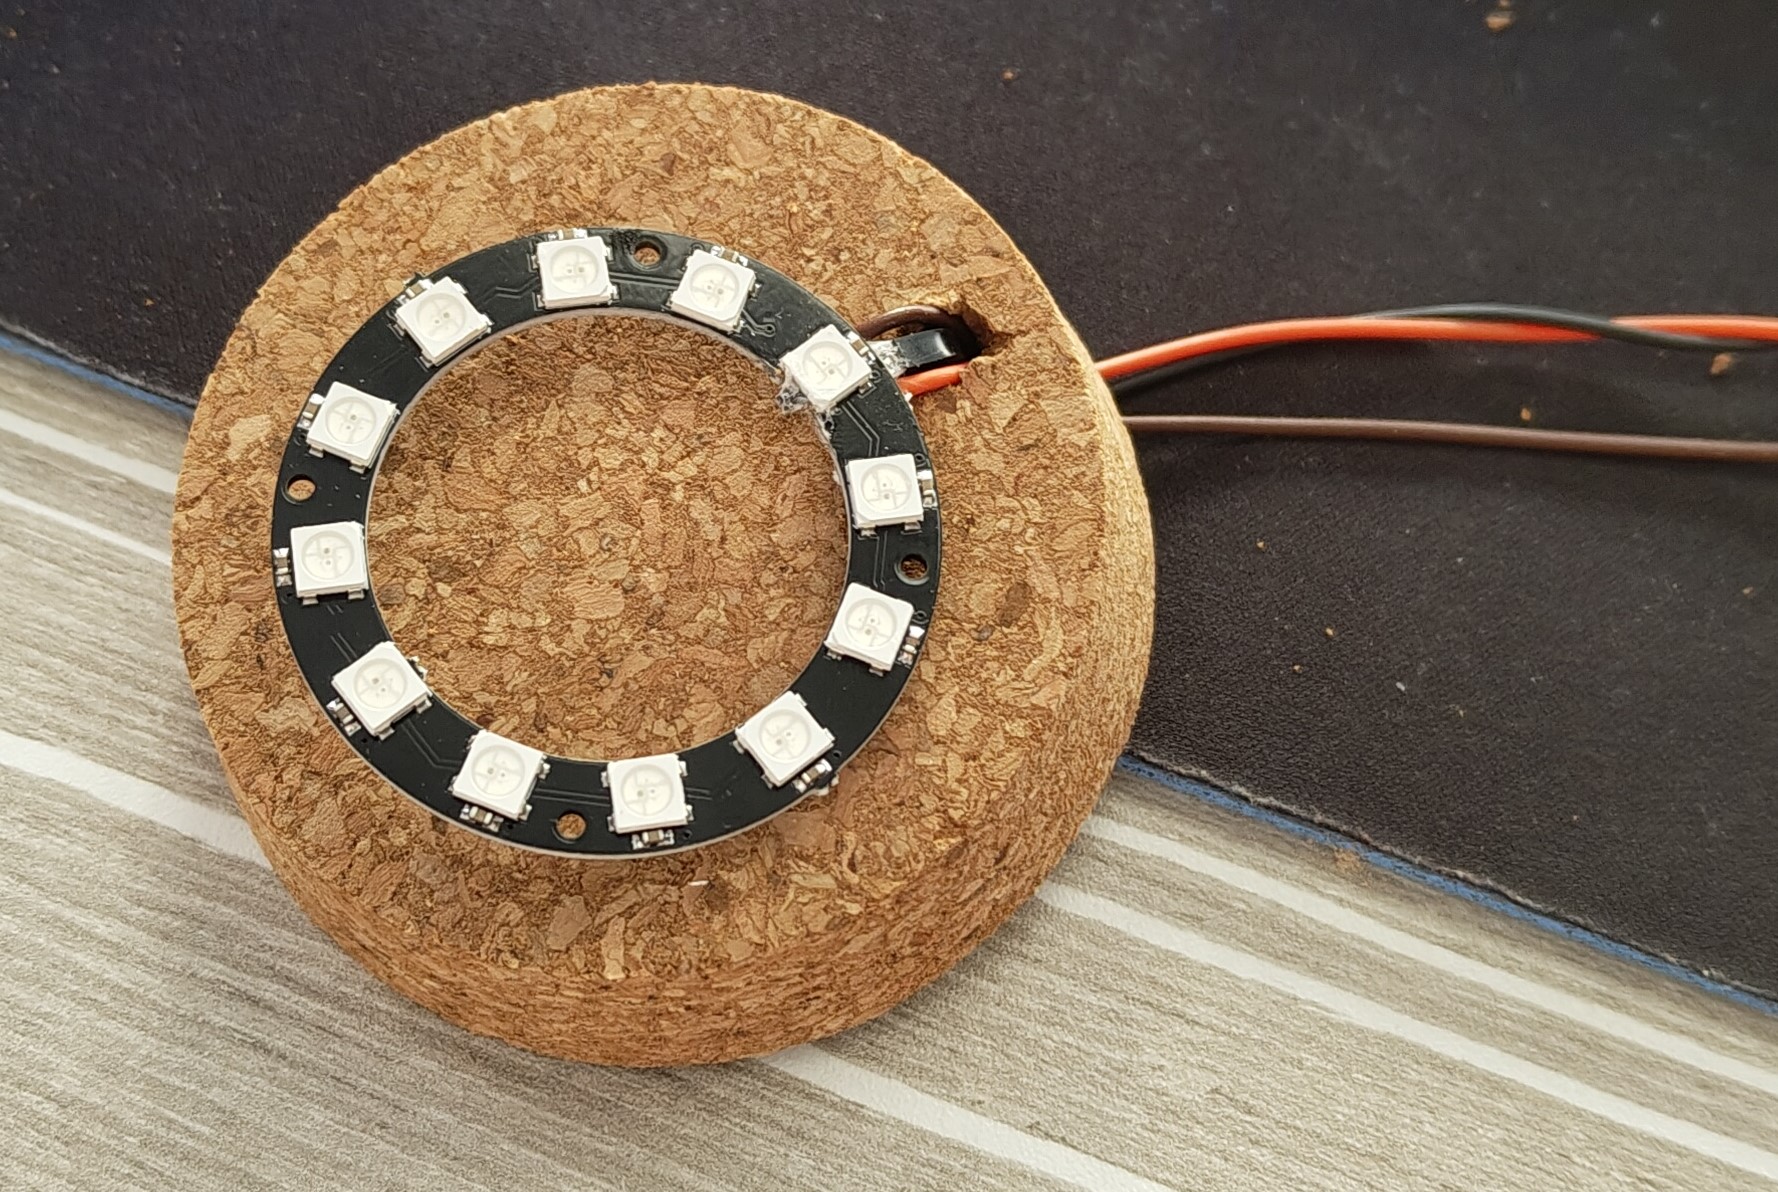
Originally I planned to use one of my Raspberry Pis to control the LEDs and host a web server/fronted to control it all. For the LEDs I chose a WS2818B LED Ring, the WS2818B control standard allows for each LED to be controlled individually (both in color and brightness), while still only being controlled by 3 pins (+5V, GND and Data).
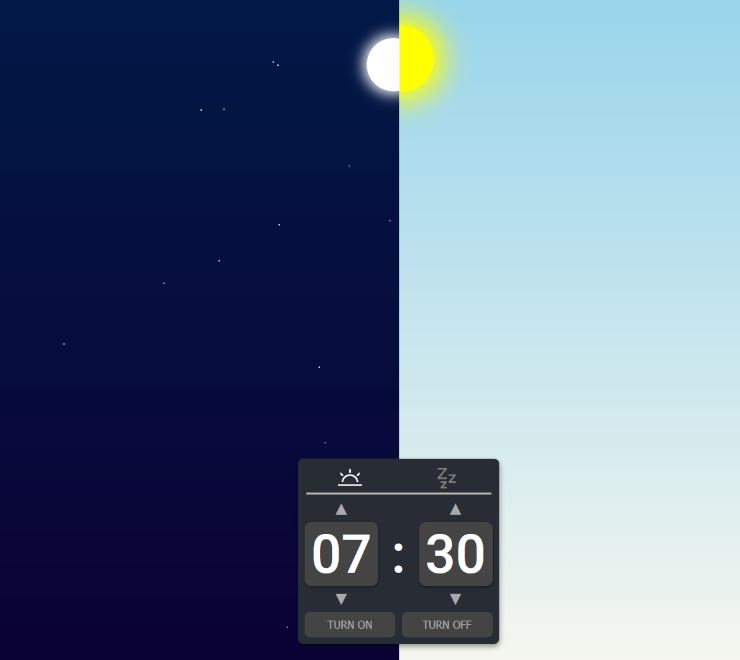
While the LEDs were being shipped I started working on the web page. As I am not the most artistically talented person I opted for a simple design, I wanted a background animation that shows the time of day/night by means of the sun/moon traveling across the sky.
The main interaction would be done via a floating control panel in the bottom, here the sunrise and sleep times can be set, and the LEDs can also be turned on and off manually. At this time it was nothing more than a clickable prototype with no functionality yet but I was happy with how it looked and was ready to continue with the actual backend.
Both day and nighttime superimposed
Let there be light
With the LEDs finally here I also ran into my first problem. Controlling them with a Pi was a mess. Controlling the LEDs had no straight forward way, there were a few libraries I tried out but nothing worked directly. The WS2818B control being a high frequency signal instead of just turning on a GPIO Pin on the Pi made me question whether this approach would even work. I also wasn't sure if my LEDs are even functional, the soldering was a messy due to the contacts being tiny, and I worried whether I damaged the Ring itself.
A friend of mine came to the rescue, lending me one of his ESP32 microcontrollers. This turned out to be a way better method of controlling the LEDs as it just worked right out of the box.
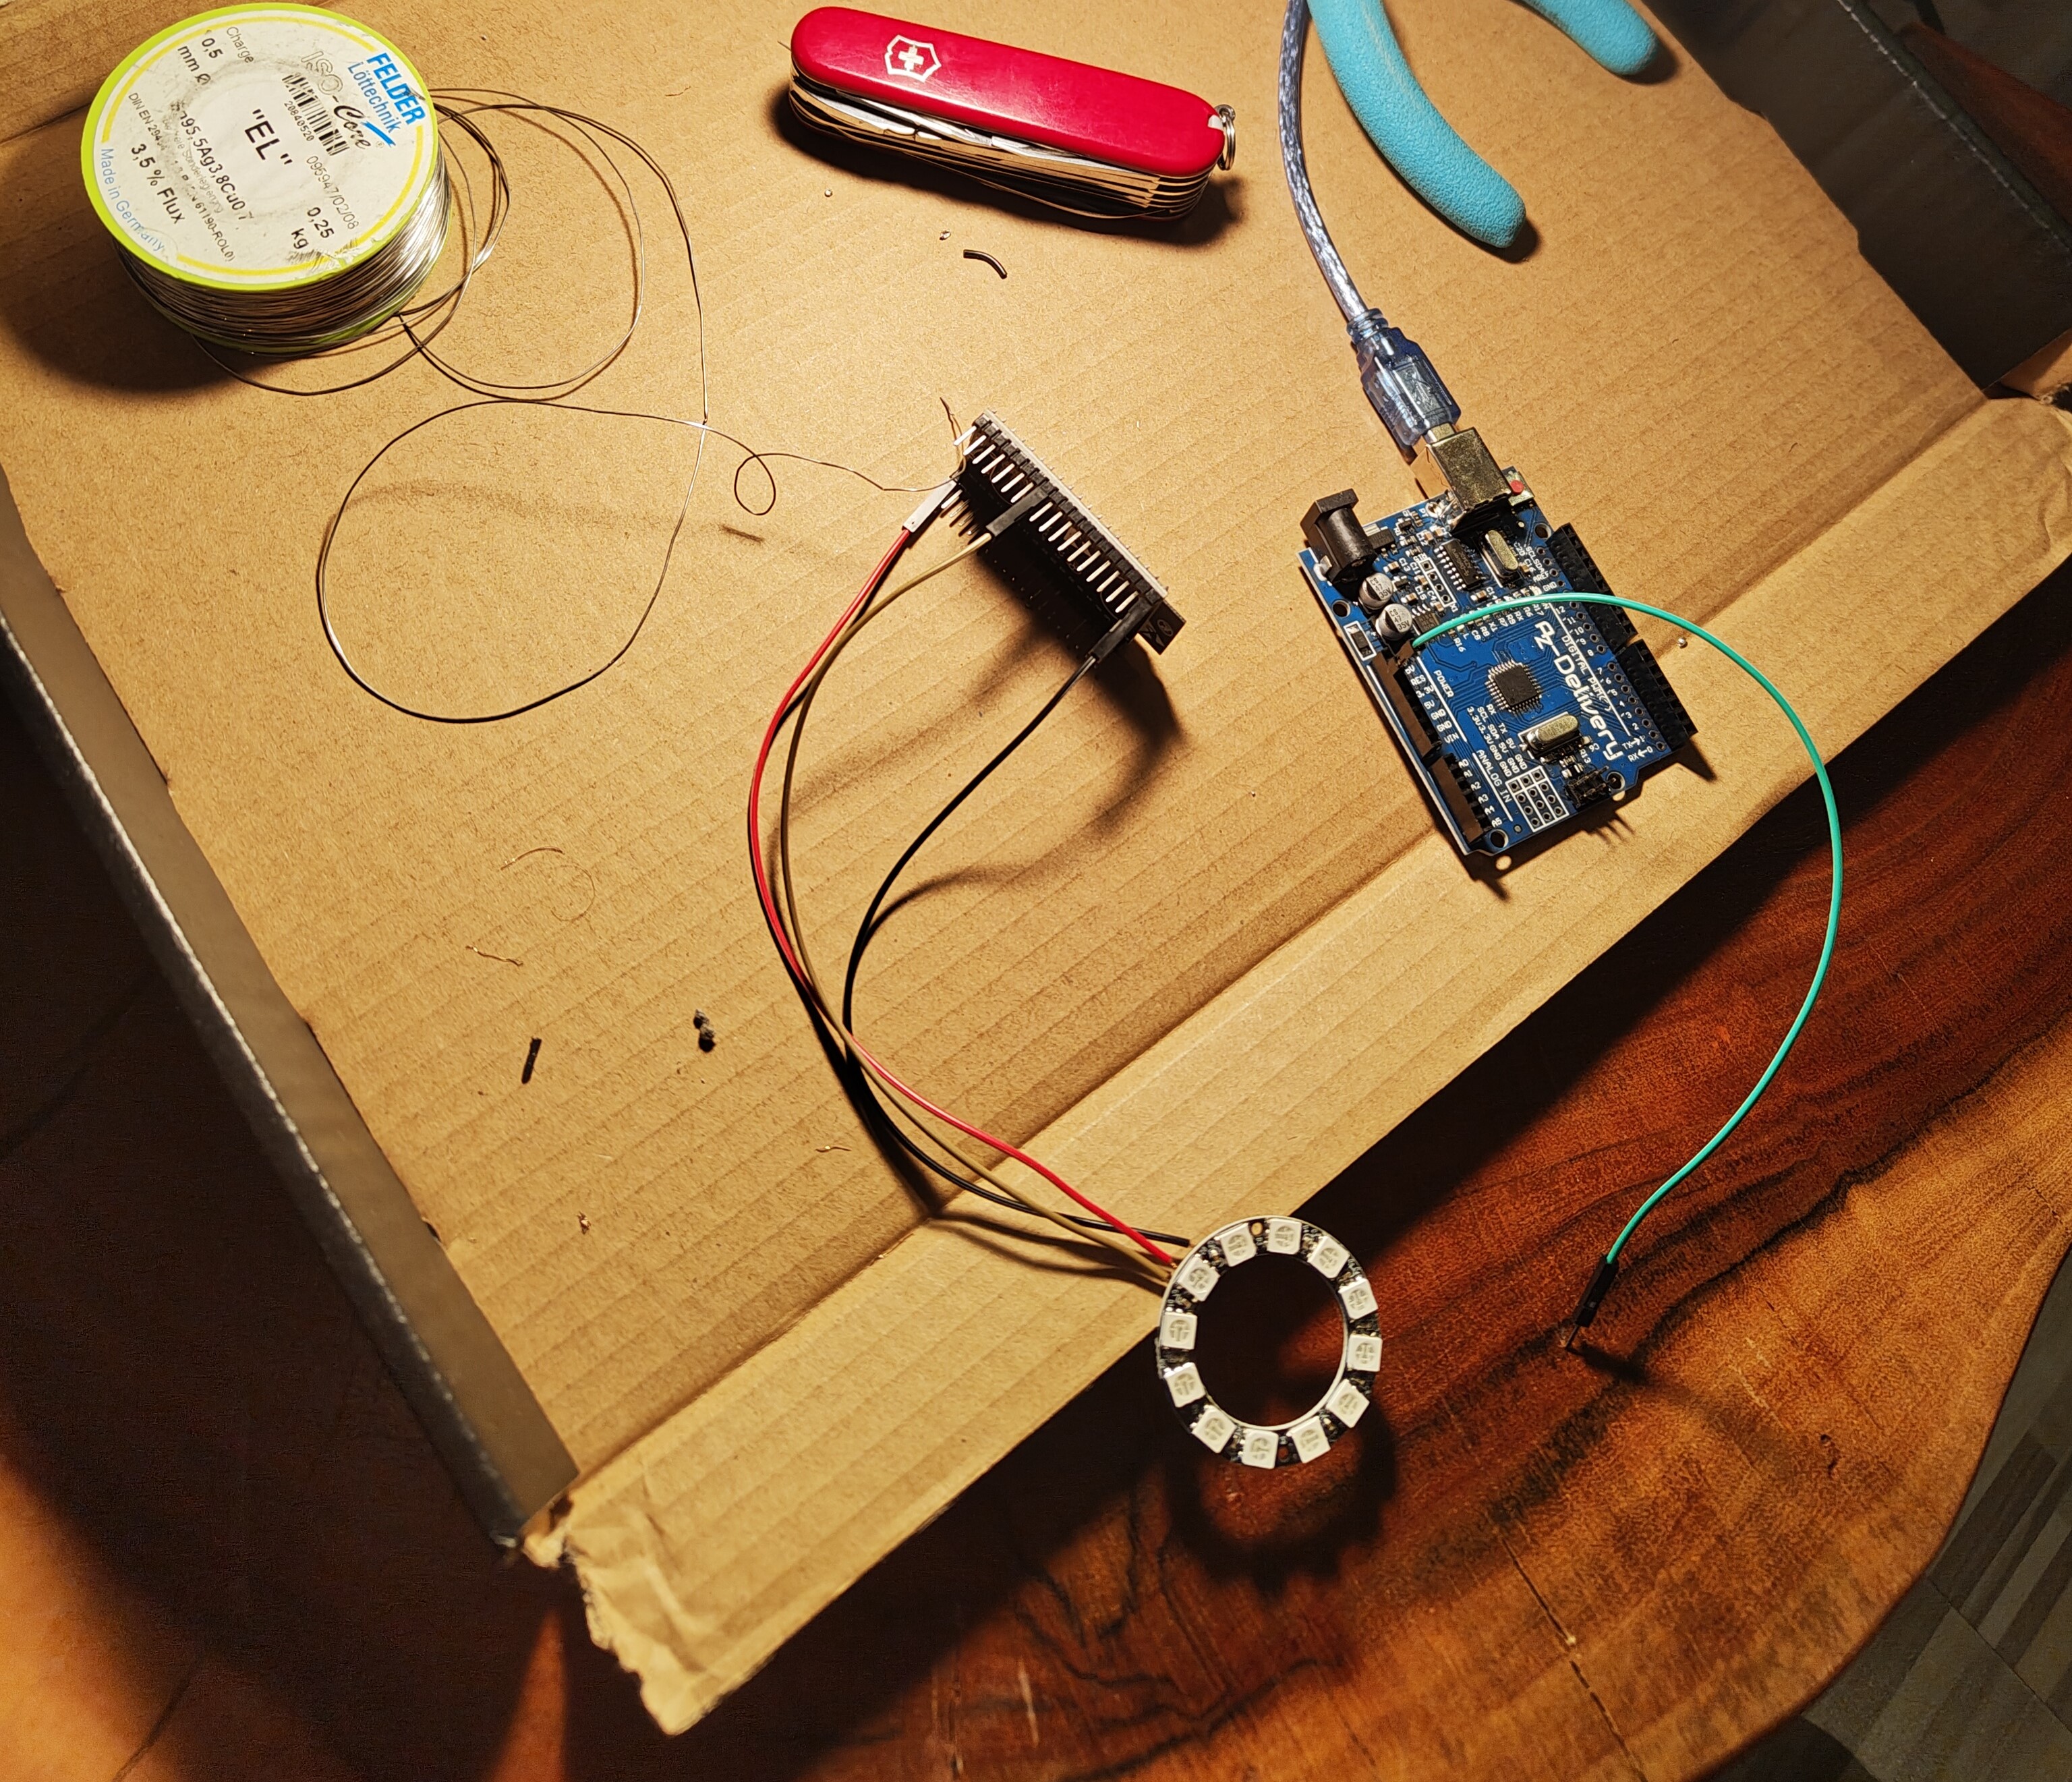
The LEDs connected to the ESP32
World's smallest web server
With the ESP32 being the way to go forward I needed to rethink my structure for the frontend and user control. I could of course keep the Pi, host the website there and just use the ESP as the LED controller. But why shouldn't I just host a small web server on the ESP itself, it's not a particularly intensive task, especially with this having such a small amount of concurrent users. The ESP32 also has both Wi-Fi and Bluetooth onboard (for just 10€ a piece btw) making up a small unit to control and host it all.
Due to the ESP32 being an embedded system, setting up a web server is a bit different to how it is usually done. Firstly there is no operating system running on the chip (you can run special Operating Systems there, but it is not needed) therefore we have no Apache, Nginx, Node or any of that bloat, there isn't even a file system on there.
But what is a web server more than just a loop listening on a socket right?
The site itself had to be put into a string for it to easily be compiled and then served from the microcontroller. For this I wrote a small python script to inline the JS, CSS and SVGs into a single HTML file which can then be put into a string.
Is it really that time again?
For setting the times and controlling the light manually I set up API endpoints that will trigger functions on the ESP32. A main loop will keep track of the time, and trigger the LEDs when the rise/sleep time is reached. Speaking of time, the ESP32 of course has an internal clock, but we'll still need to set it to the actual time. Luckily this problem is already solved, and we'll just have to set our clock with from the web.
I also wanted to have a small animation for turning the LEDs on and off. After all I can control all LEDs individually. The idea was to turn on one LED after another to have a nice fade in/out effect instead of an instant blink. Originally I just used some delays in a loop to achieve this, however the
delay-function will pause the entire thread on the chip, making the website and API unresponsive.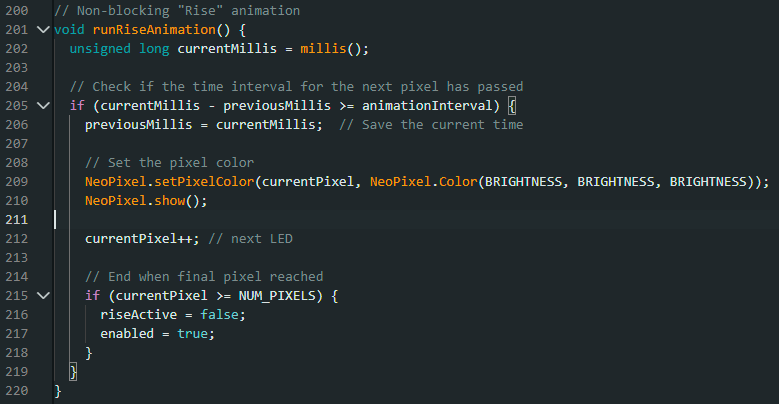
The rise animation animates a fade to turn on all LEDs
With there being no OS on the chip there is also no scheduler or time-sharing, this means multi threading and async functions don't just work out-of-the-box like they would on a usual OS environment. There are libraries and ways to achieve a similar functionality (or you can always implement your own) but for now I achieved the same effect by replacing the delays with a time checking method which checks the time intervals for enabling the next pixel.
Making a case for the controller
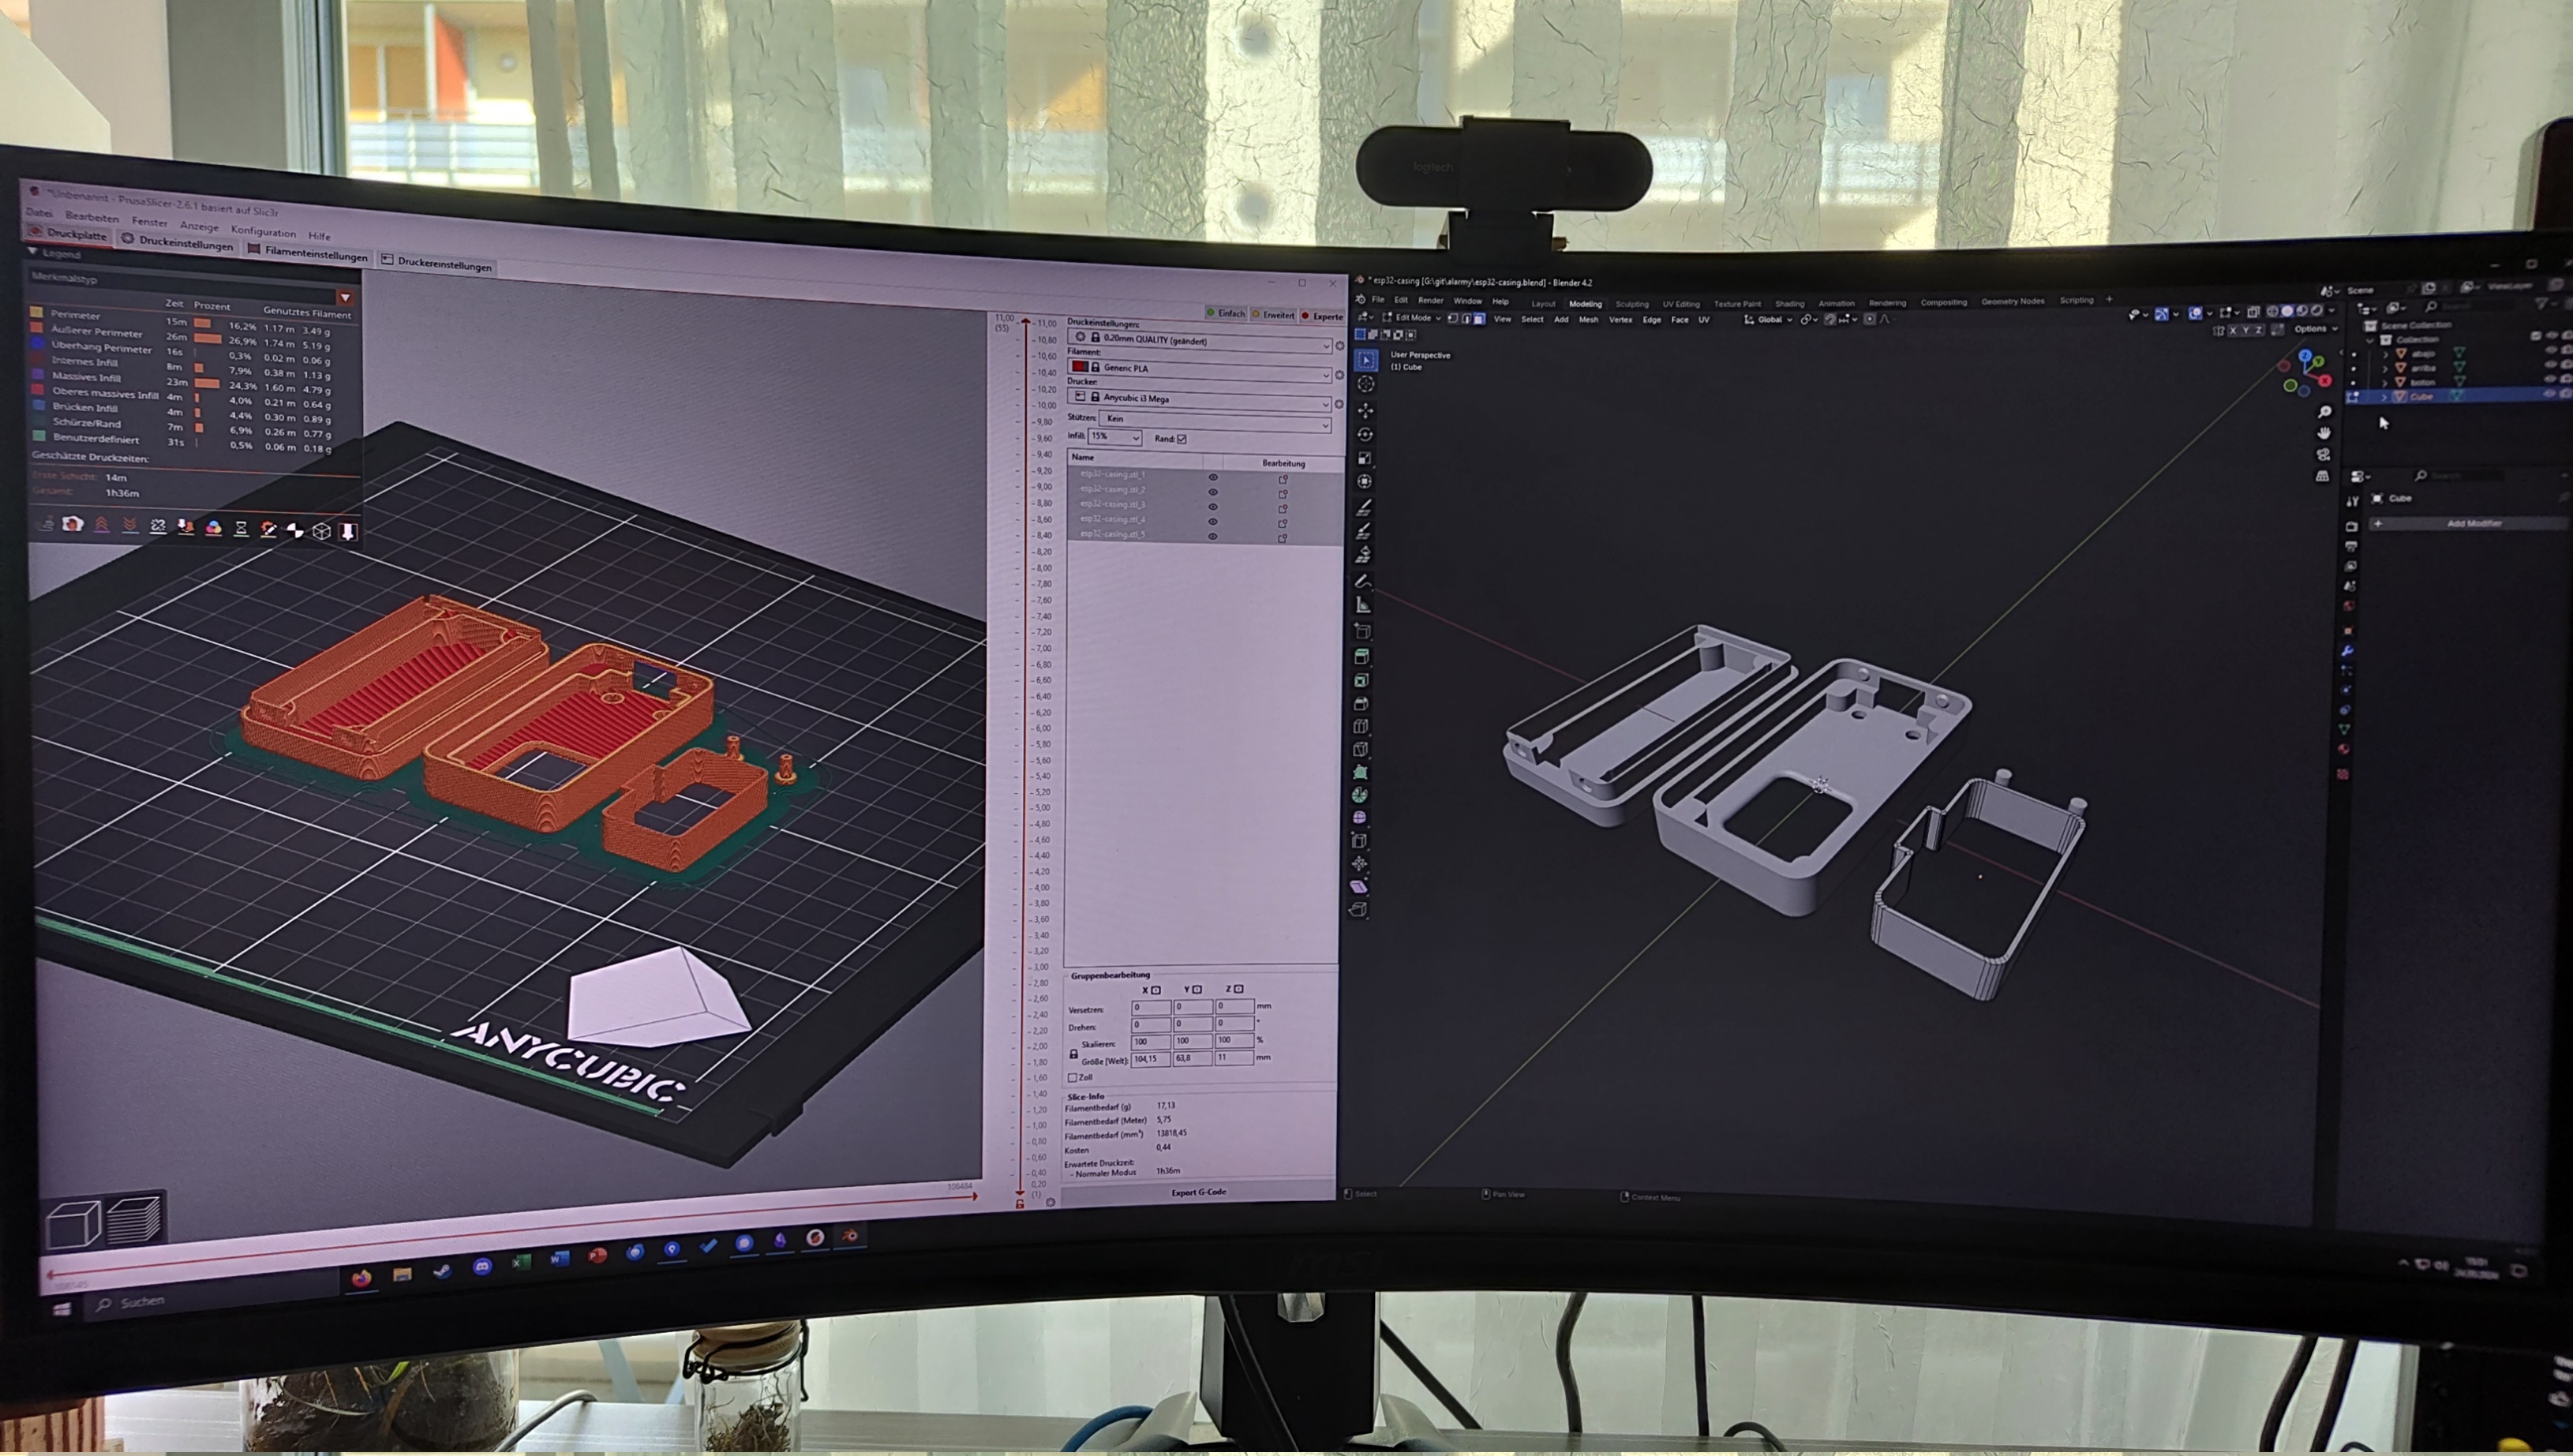
Of course, I couldn't leave the ESP just open and exposed to everything, so I set out to design a case. I found this nice case on Thingiverse and after modifying it a bit to fit my needs it was ready to be printed.
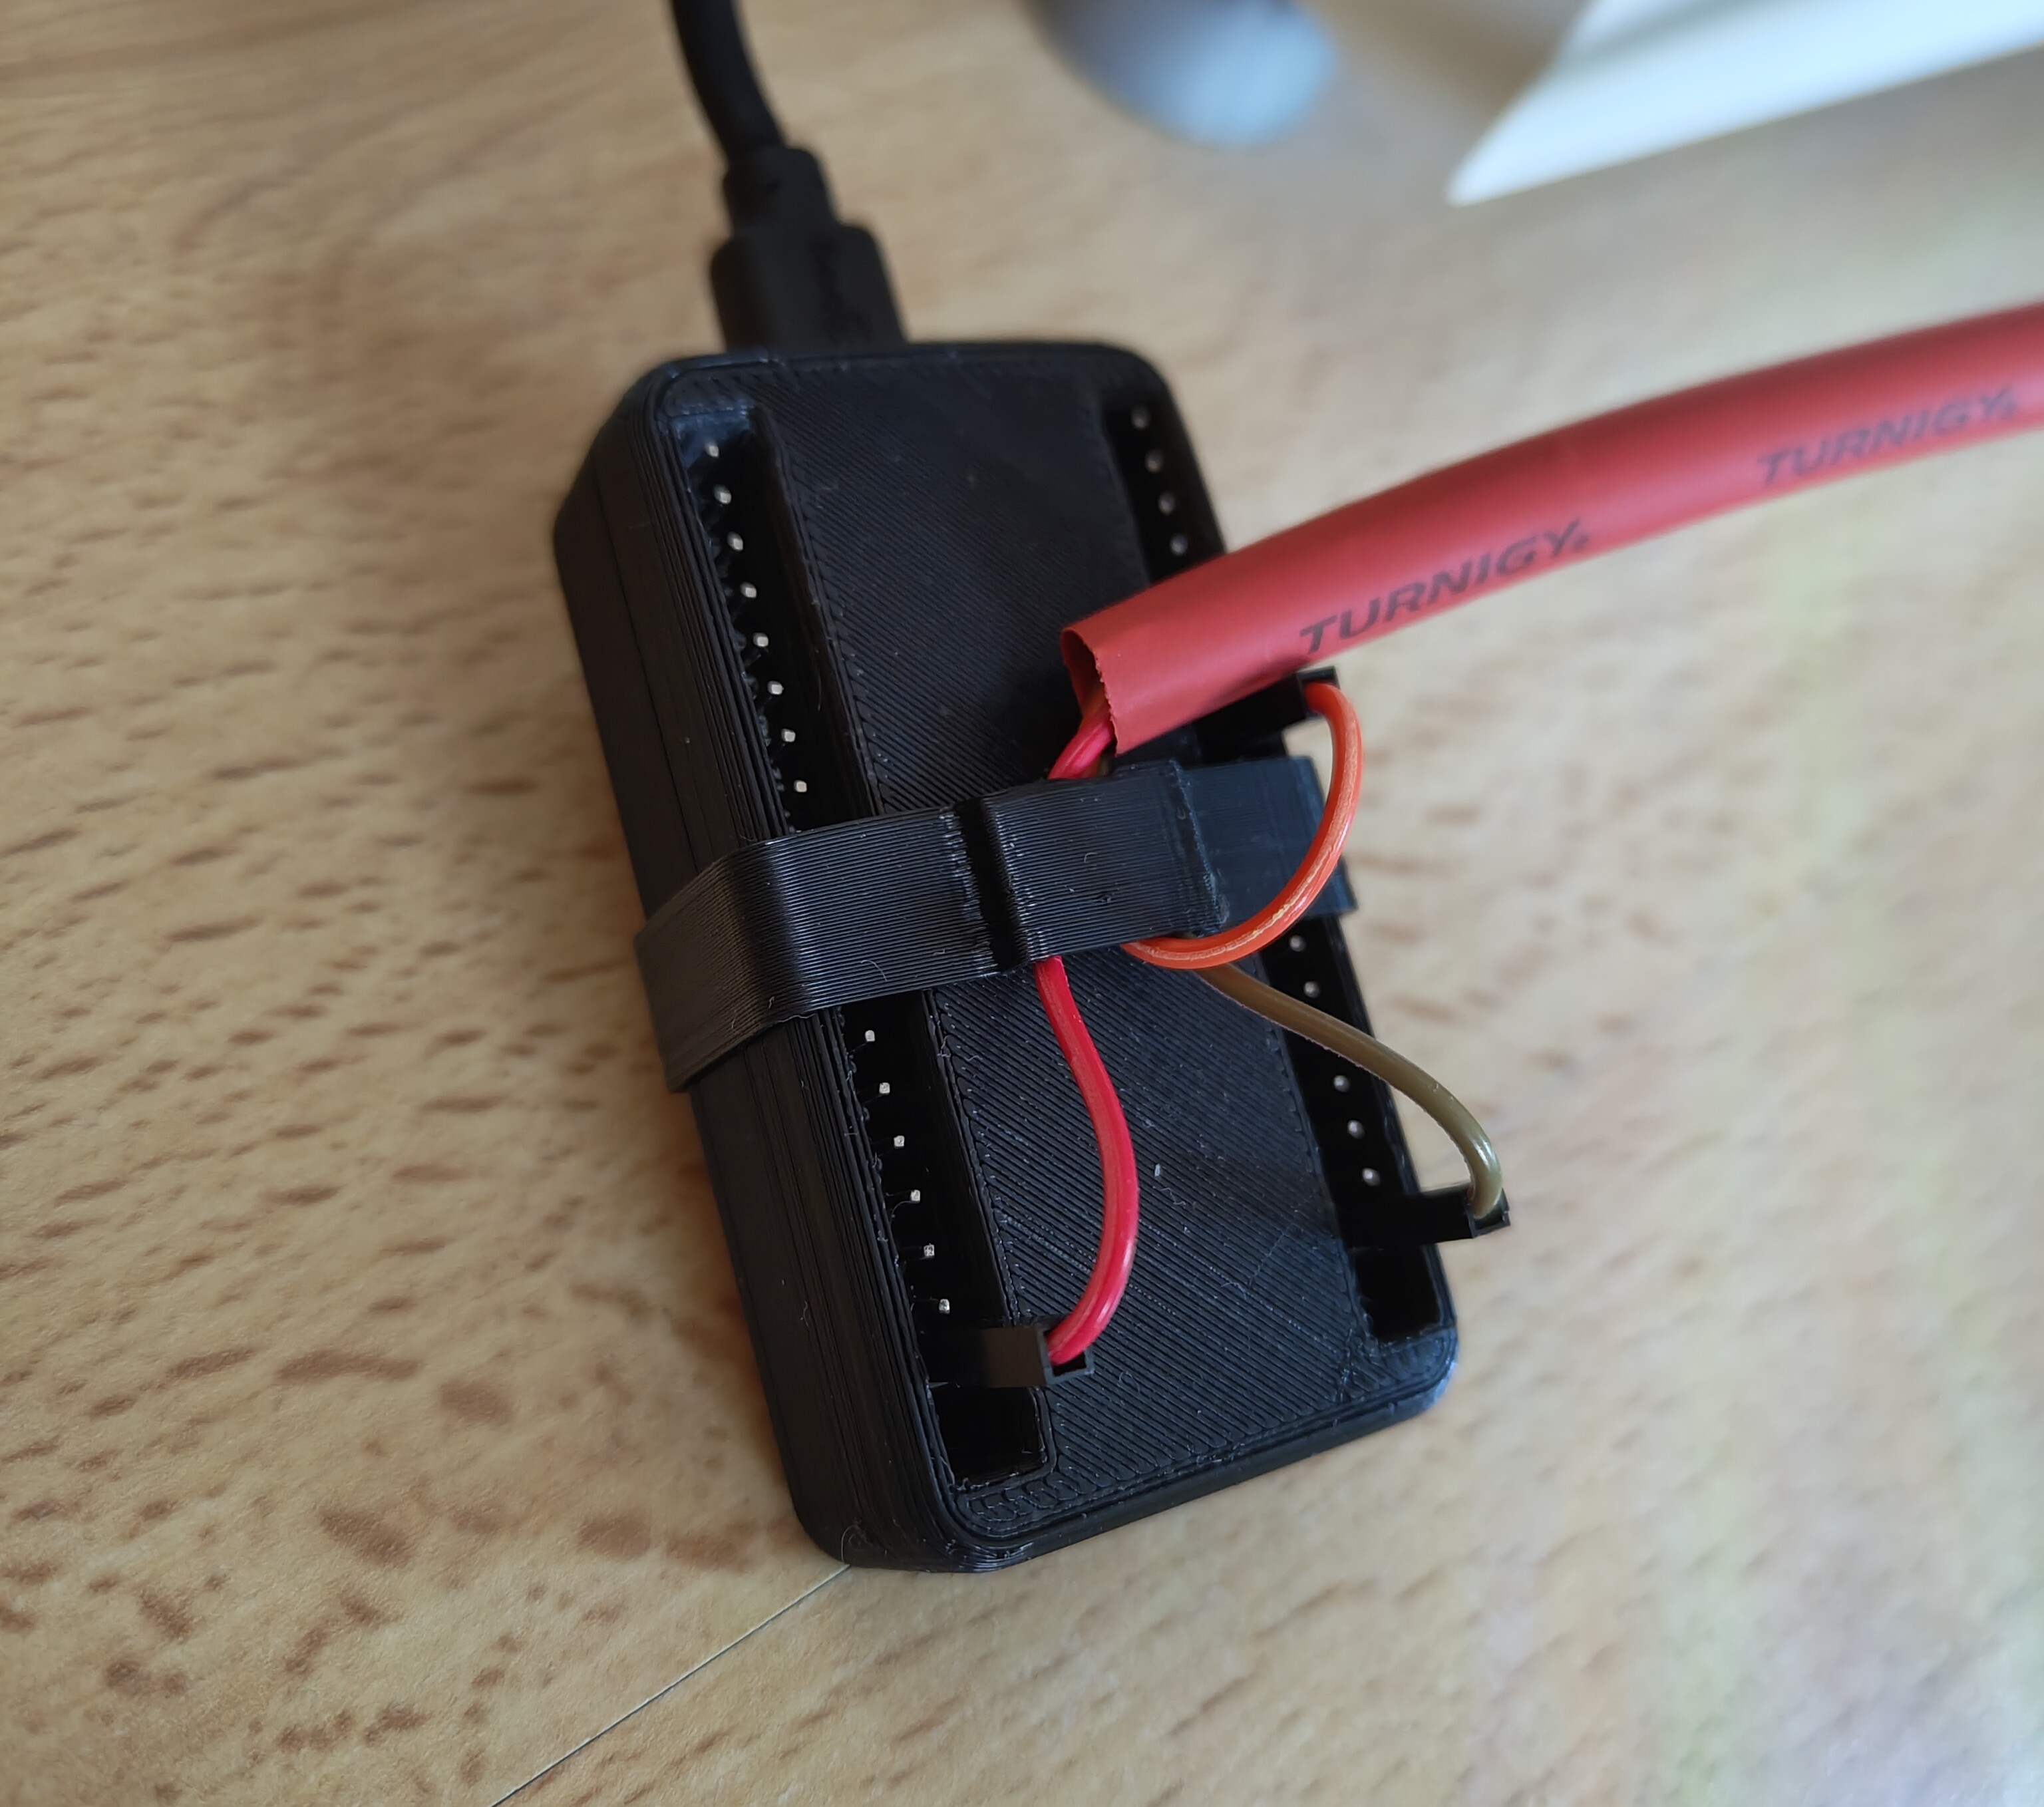
The final case is quite small, with the pins being exposed on the bottom, and the USB Port and the 2 Buttons on the top exposed as well. The ring around the case is holding the cables together, feeding them into the tube and acting as a strain release.
Building the jar
Lastly the jar I ordered arrived, I also got my hands on a larger LED Ring (of the same kind) that I could use as a drop-in replacement. The bigger ring (50mm instead of 37mm) looked way better on the cork lid of the jar. After soldering the cables to the Ring, I drilled a hole through the lid to bring out the wires. I secured the LEDs with silicon and filled/sealed the drilled hole with the wires.
Sadly the light is not entirely centered, but luckily you can't see it when the jar is closed
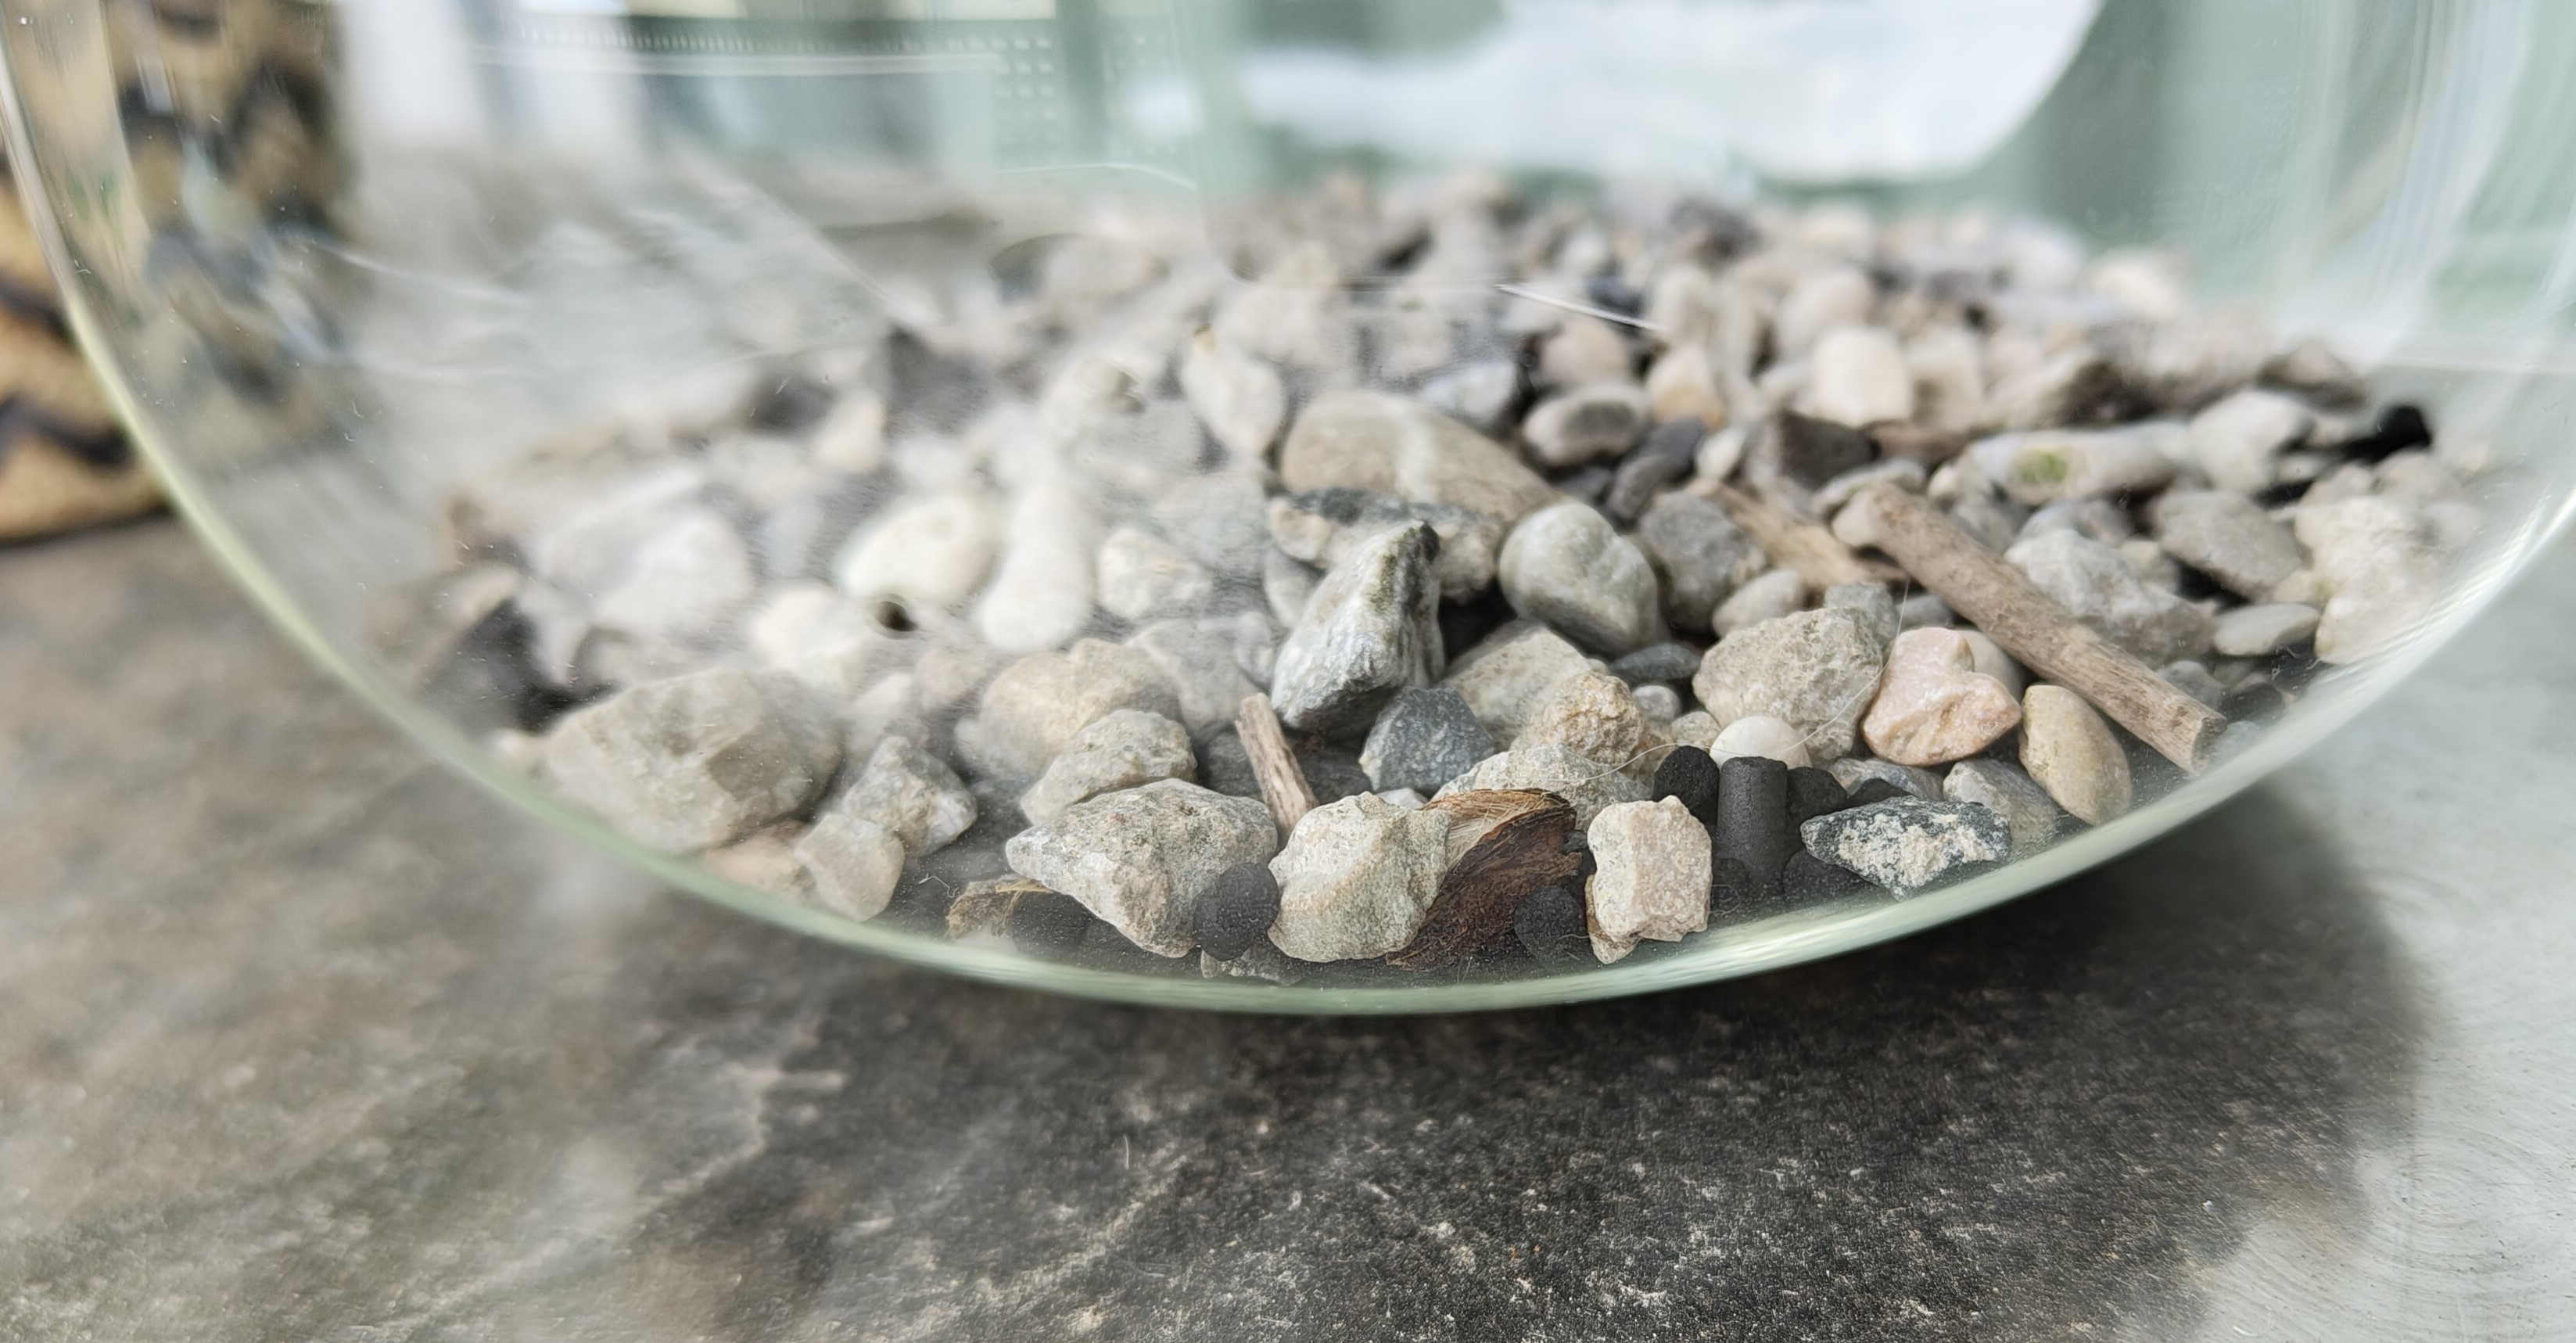
For the eternal terrarium itself I had a few ideas to make it last longer than my previous attempts. First the jar is larger than my previous ones, which helps keeping the ecosystem stable. I also wanted a bigger substrate layer, this is crucial for filtering the water, keeping nutrients and providing a good growing medium for the plants.
Most of the ingredients I sourced from the small lake next to where I live. Taking soil, rocks and moss directly from the outside helps, as the soil will already contain helpful flora and fauna. I did however buy a nice center piece plant that I thought looked great in the middle.
The bottom substrate layer
The lowest layer consists of small pebbles and rocks as well as a few pieces of coal for filtration and for holding water so the soil itself isn't always trenched in water leading to mold. On top of that I put a layer of soil, followed by the moss which I put around the edges, leaving a hole in the middle for the main plant.
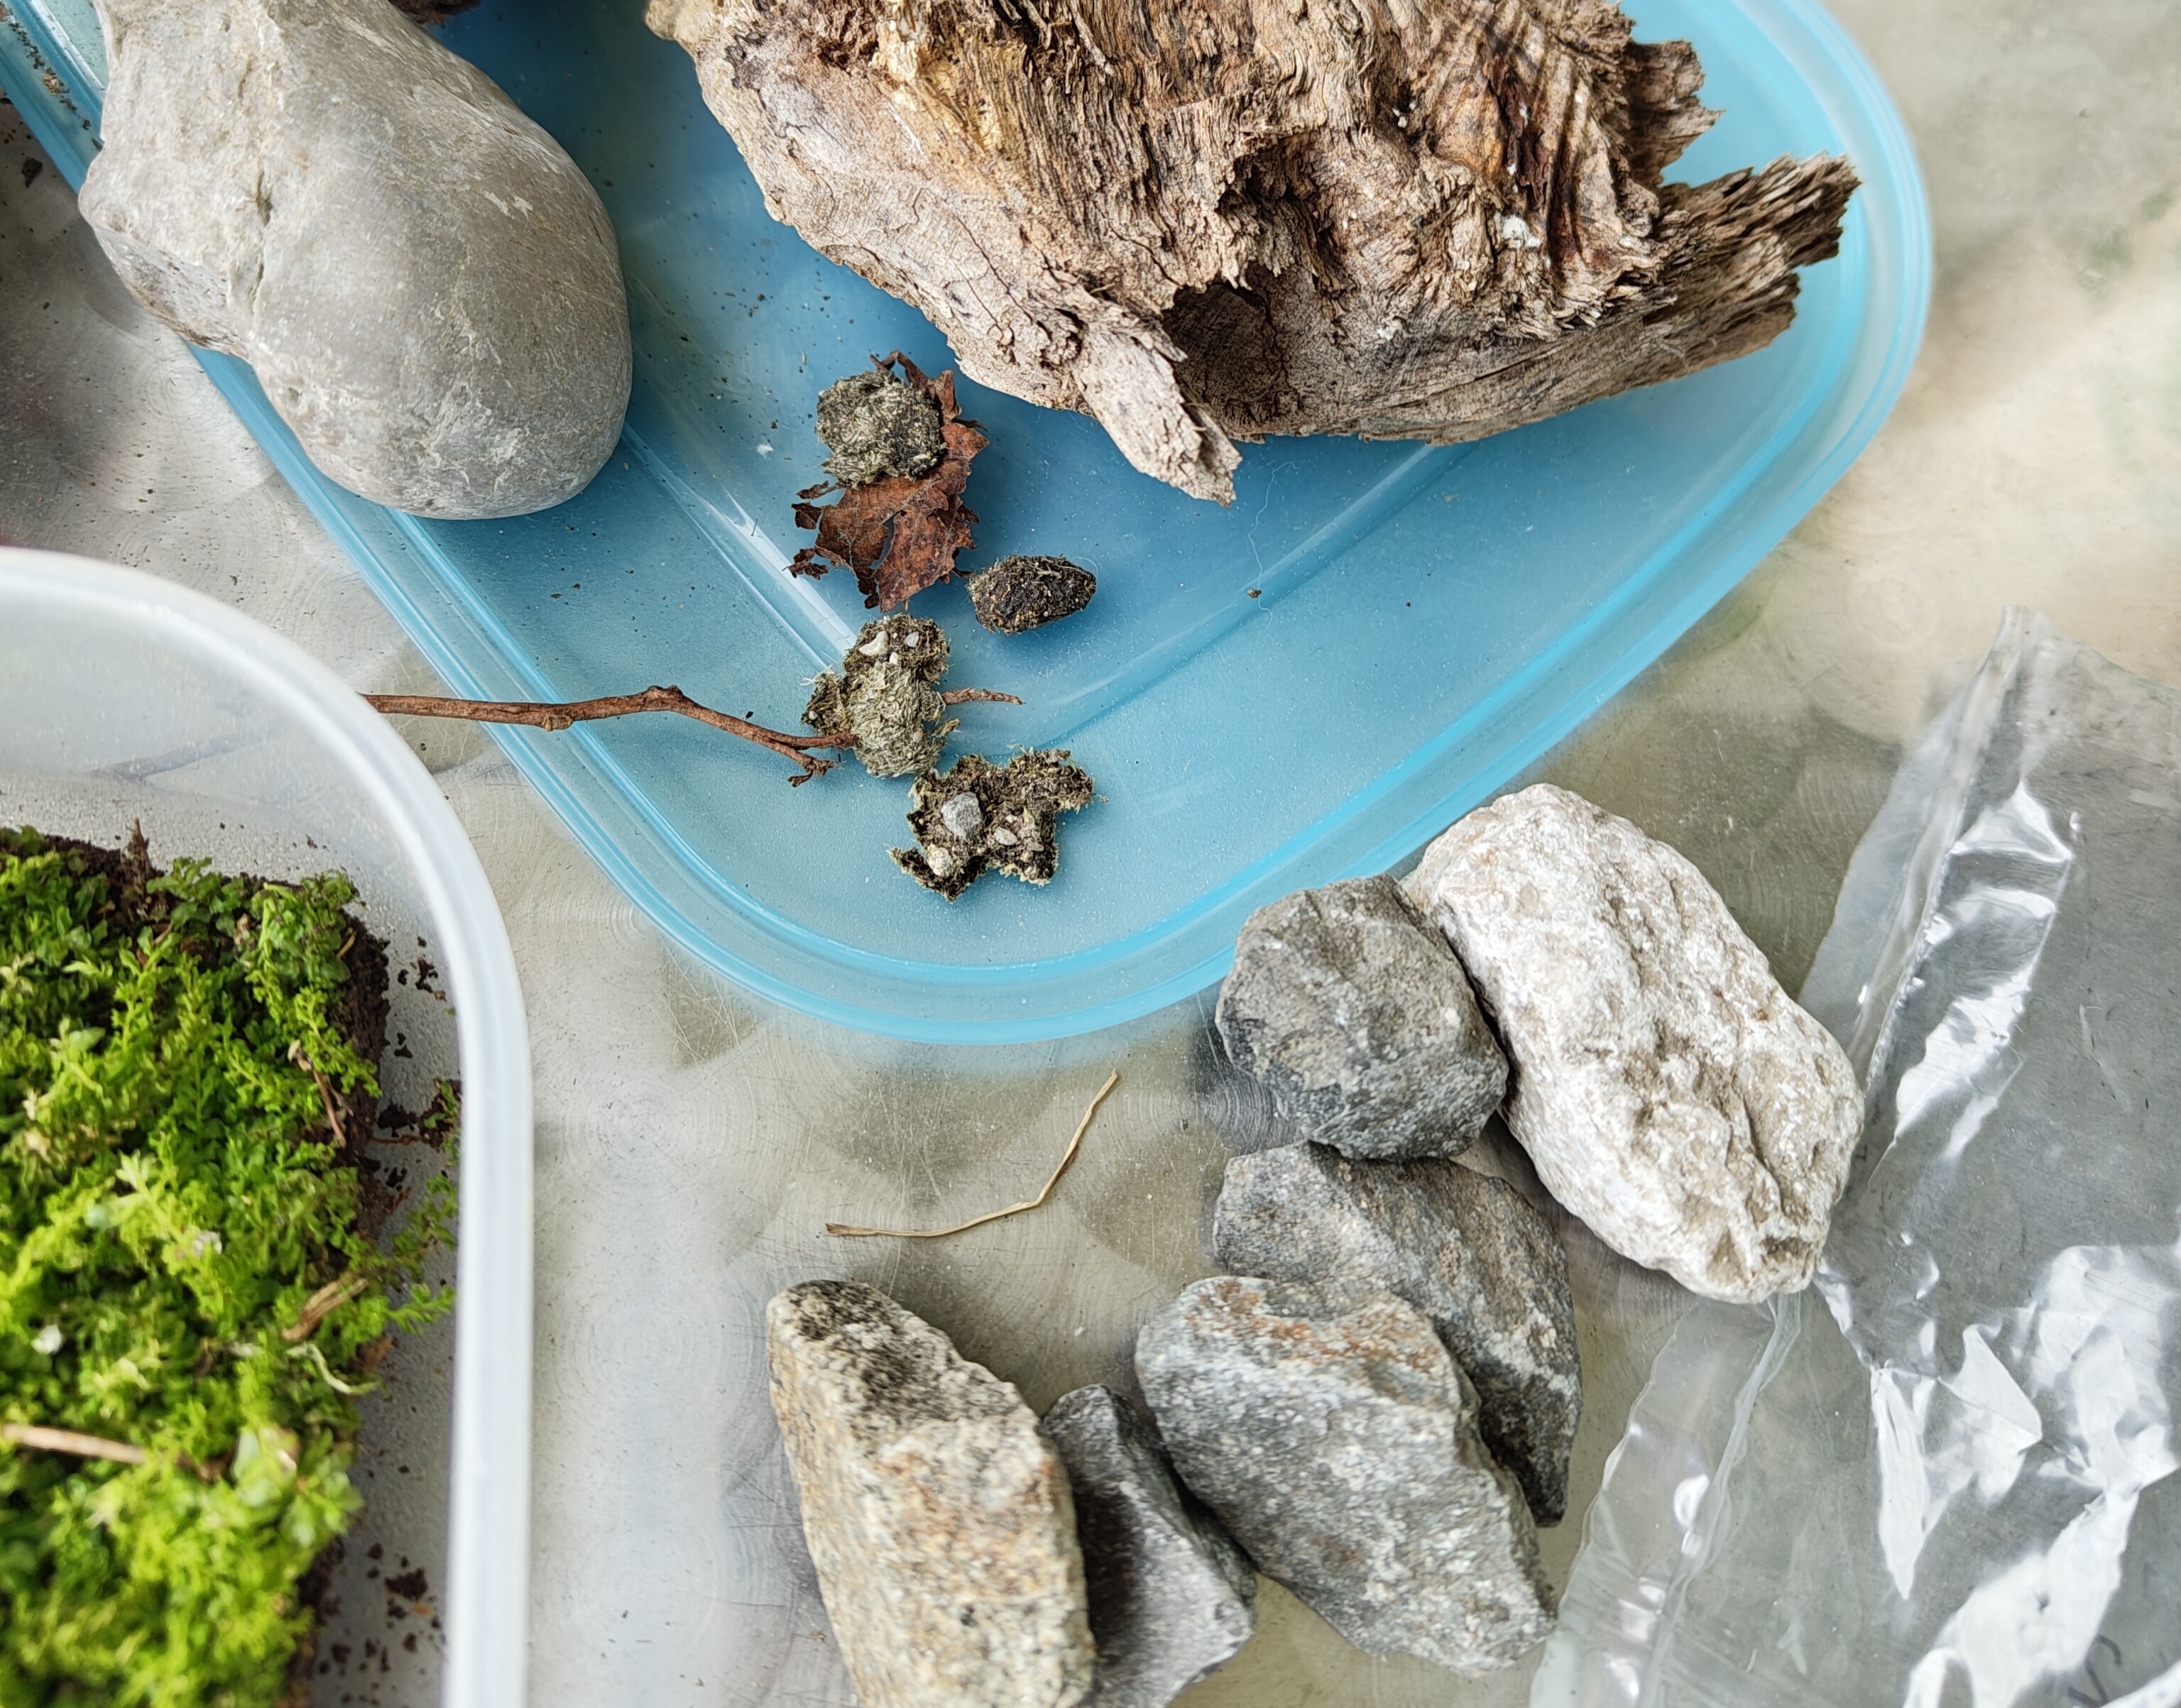
For the hardscape I collected rocks and wood, I only used some of the smaller rocks however
Apart from the main plant I also put in some small rocks and a pine cone to finish up the scape. In my opinion it looks really great, and I hope it lasts.
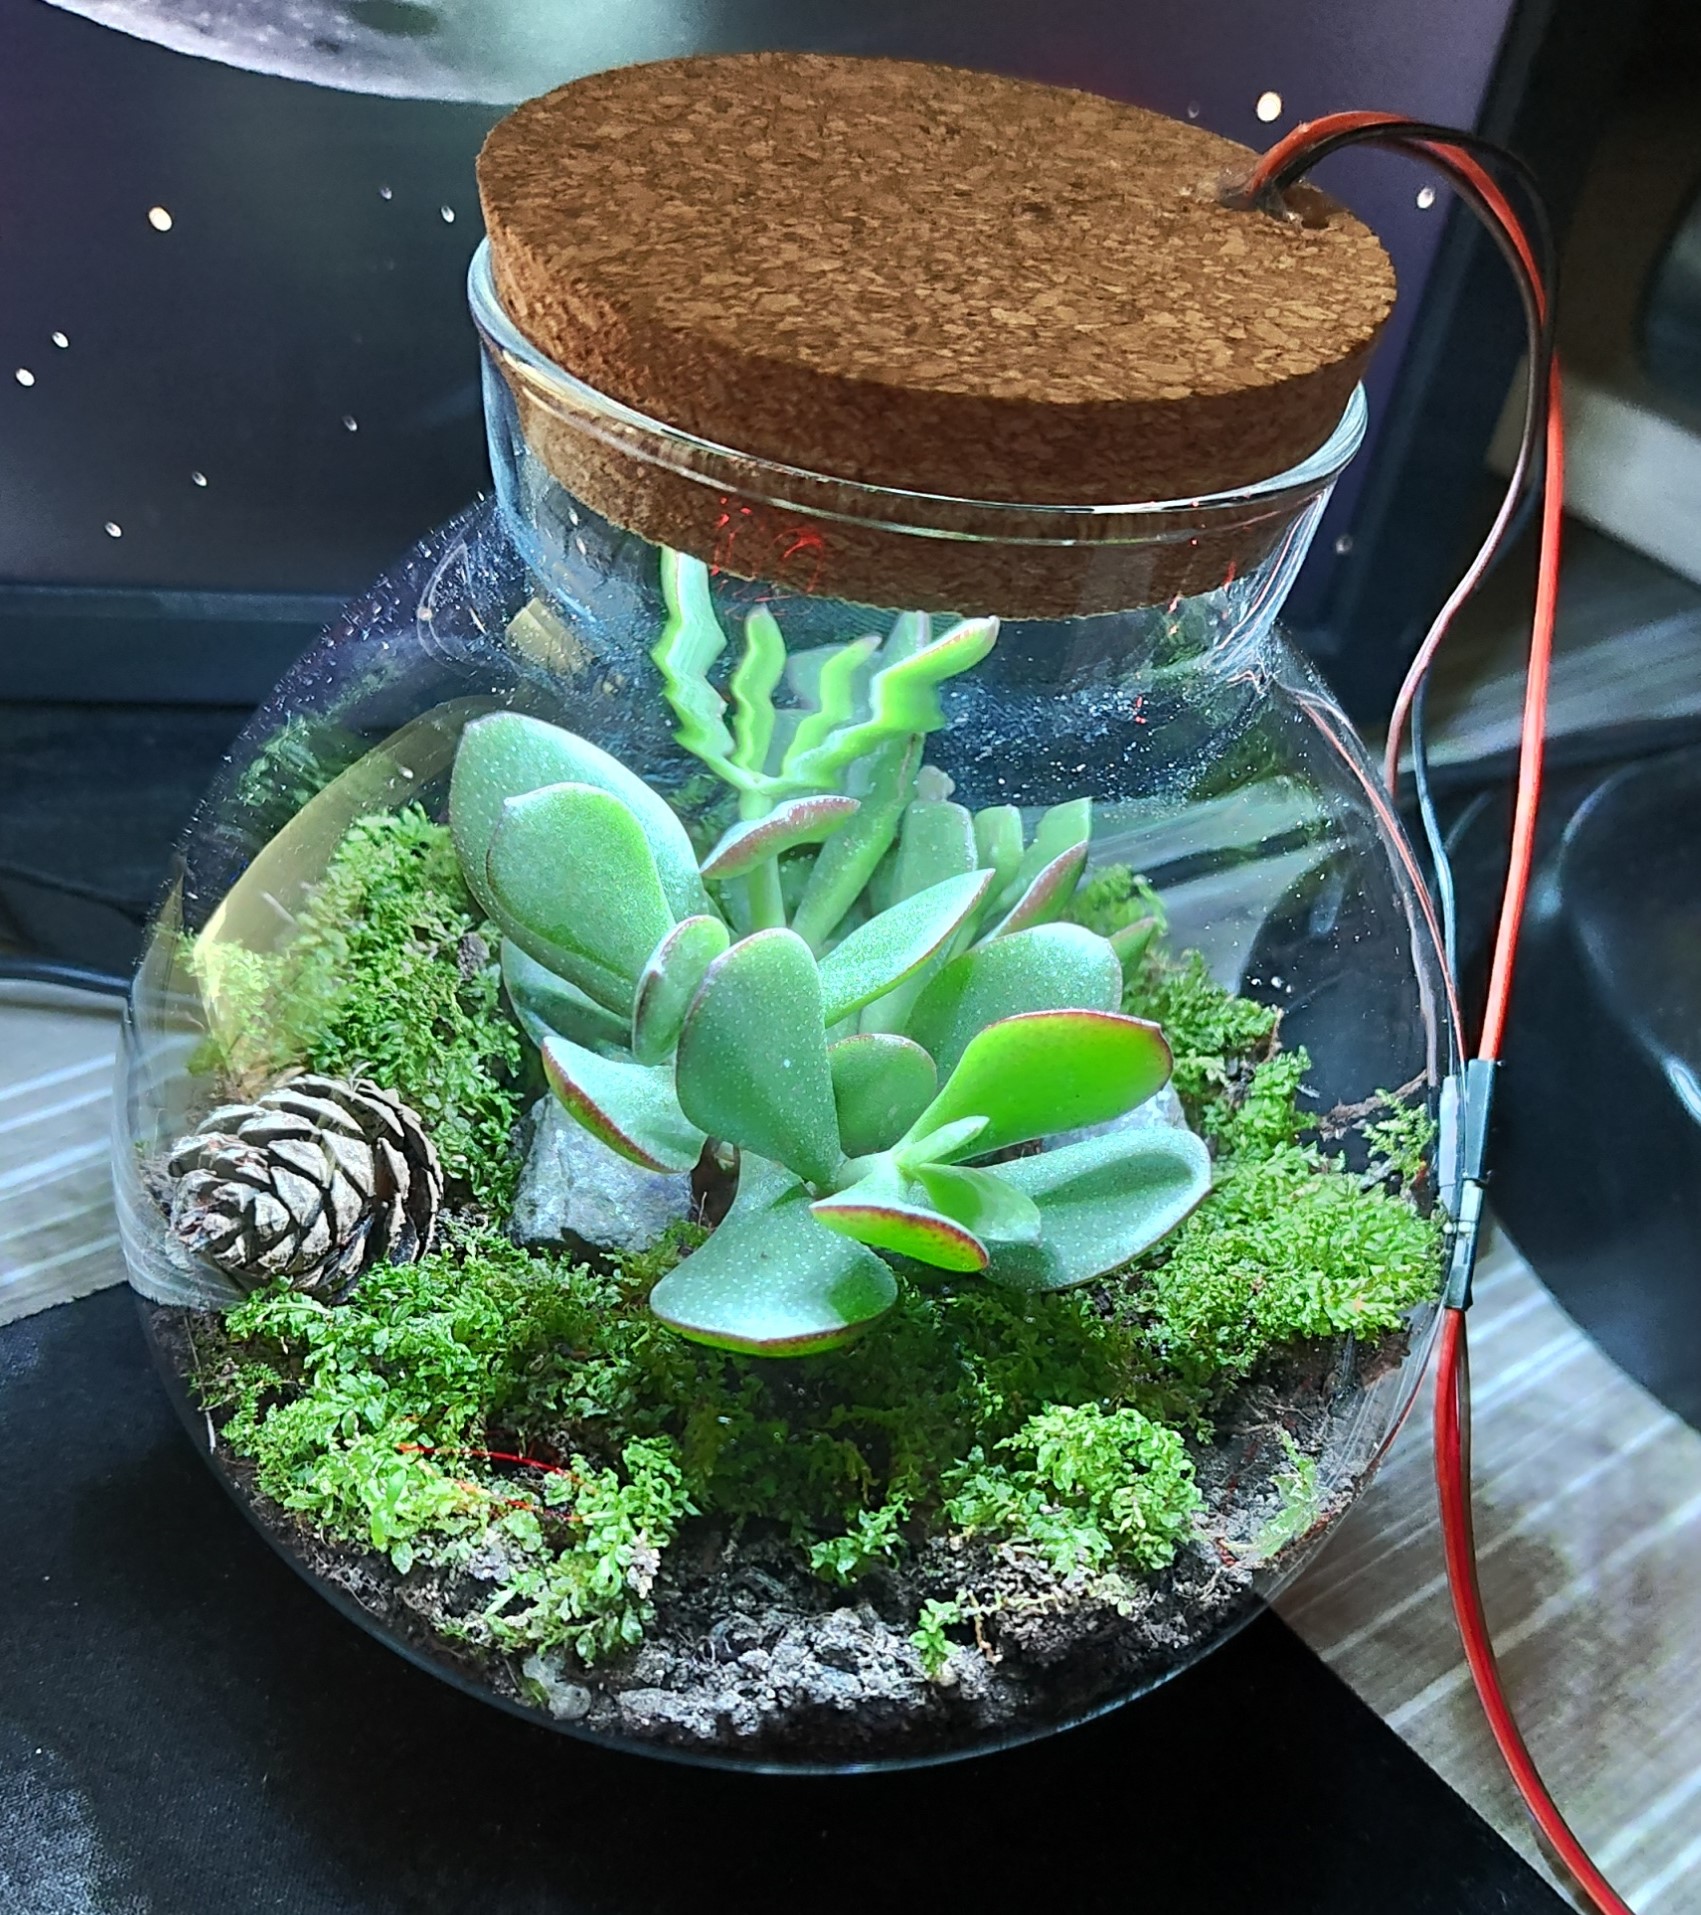
The finished terrarium with the lights turned on
Future
While I have a limited amount of time to finish it (can't give in to the feature creep) I still have a few ideas on thing I want to improve on in the future, either as software updates for this jar, or for future versions.
First off currently the Wi-Fi access data is hard coded into the script, I would like to build a setup step however where the ESP32 will host a small Wi-Fi Hotspot where you can enter the credentials for the main Wi-Fi where you want to use it from.
I'd also like to explore persistent data storage on the chip, currently the times (and in the future maybe the Wi-Fi credentials) are not saved, meaning they are reset after a reboot or power loss.
Another idea is to allow for more customizability for the color, brightness and fade in/out animations.
I also haven't made the code public yet, there are still a few things I want to clean up, but I'll add it to the post once it's ready!